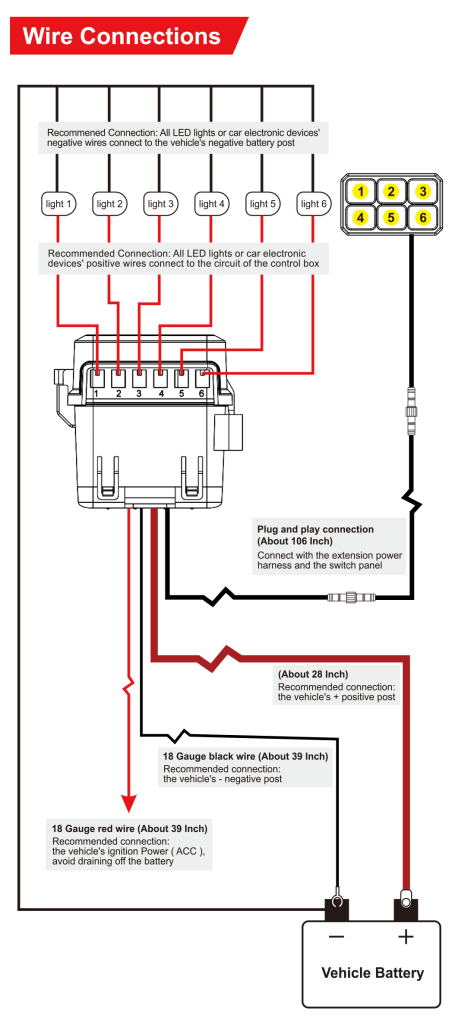
Please do not attempt to extend the plug & play wire. Cutting or splicing may void the warranty and damage the product.
Lorem ipsum dolor sit amet, consectetur adipiscing elit. Ut elit tellus, luctus nec ullamcorper mattis, pulvinar dapibus leo.
This switch panel electronic relay system has six switch circuits, each has a maximum current rating.
The total operating amperage of the connected accessories can not exceed 60 amps (600 watts).
You may have multiple electrical devices or auxiliary LED lights connected that total more than 60 amps, but you can not have them turned on at the same time.
Otherwise, the control box will be damaged. The switch
panel comes configured with the following fuses:
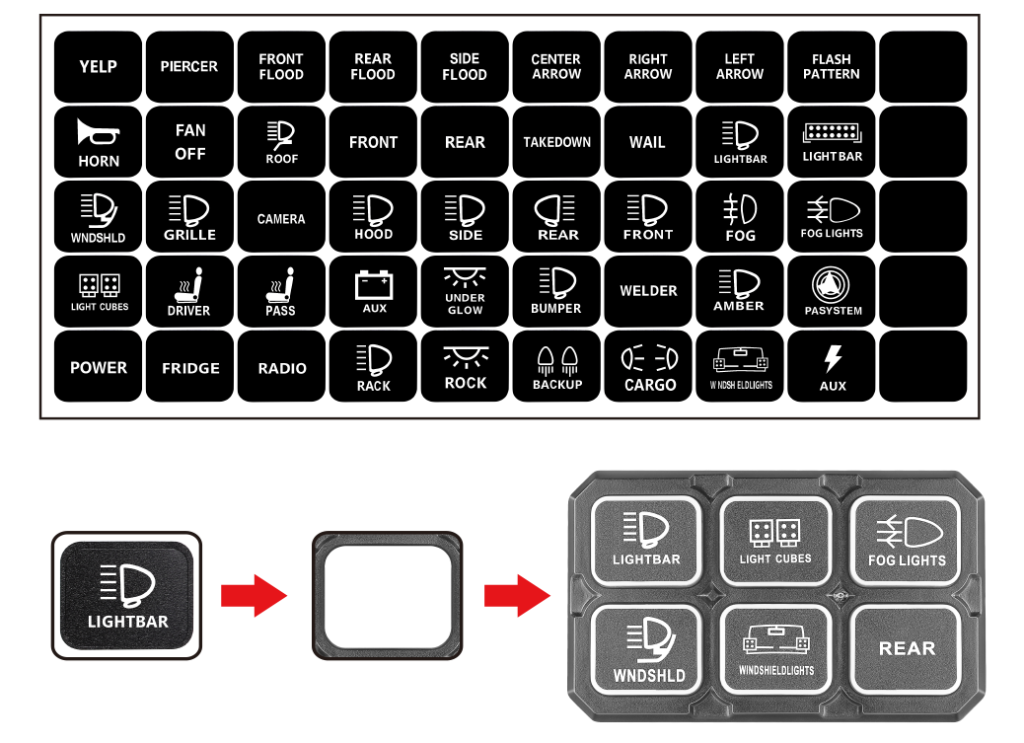
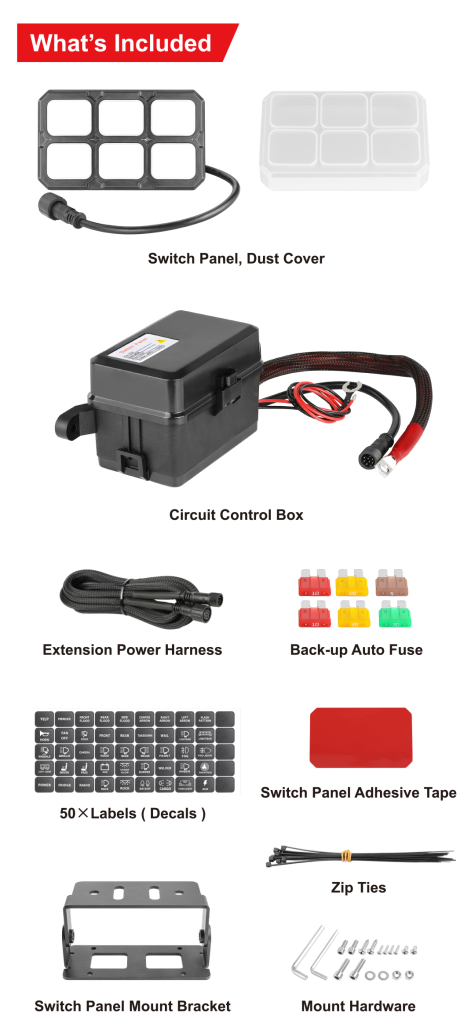
50 PCS Pre-Made Lables
Thoroughly clean the switch panel. Use warm soapy water first to remove all wax and dirt. Then dry and use a cleaner such as rubbing alcohol to clean the surface. Once clean do not touch.
Peel off the lable and firmly press down on the switch panel.
Multi-function labels for DIY your specific needs.
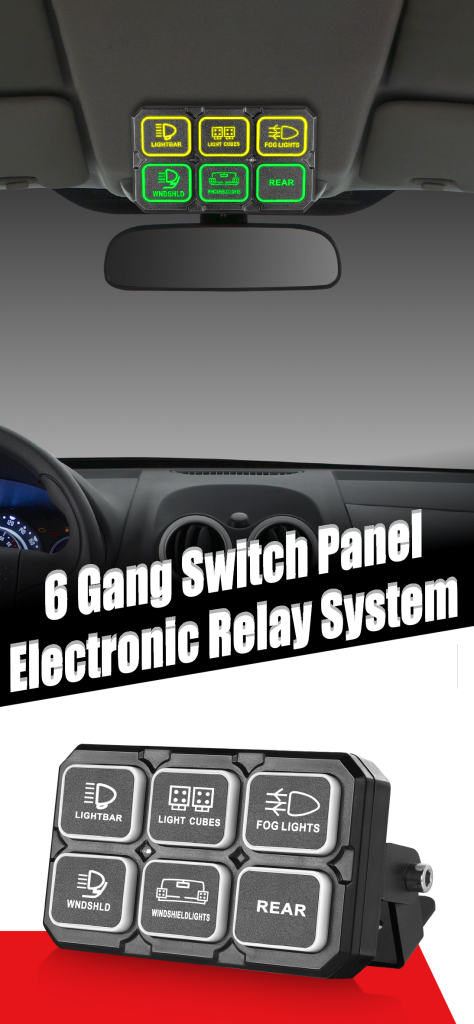
The best way to install and control six auxiliary LED lights or any other electrical devices.
Specifications
Item: 6 Gang switch panel electronic relay system
Switch Lighting Color: Green backgroud light
Switch Lighting Color: Yellow light when circuit is powered on
Application: To control car LED lights or electronic devices
Car Make: Fits to 12Volt DC vehicles only
Switch Type: Push button
Input Voltage: 12V DC
Maximum Output Power: 600 Watt
Maximum Input Current: 60 Amps
Switch Panel Dust Protection: Yes
Over-voltage Over-current Protection: Yes
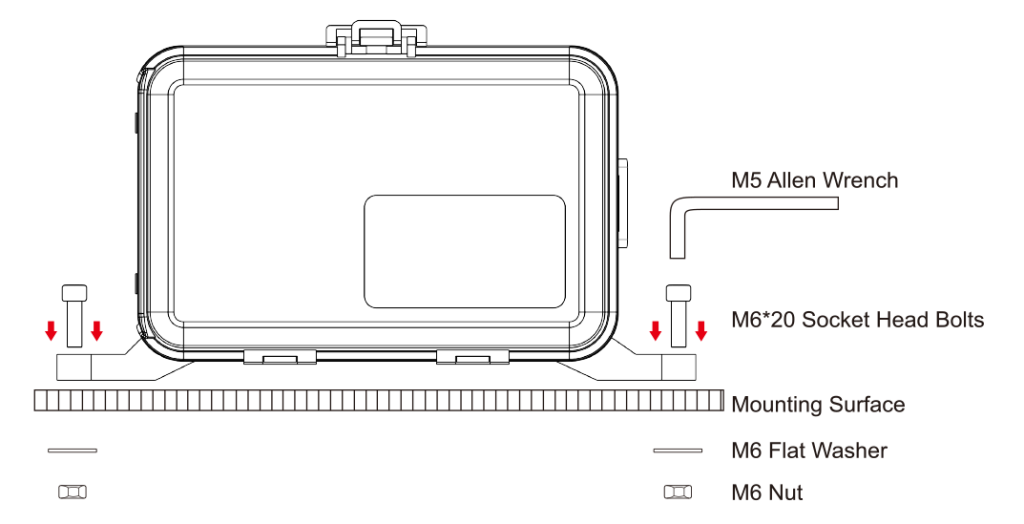
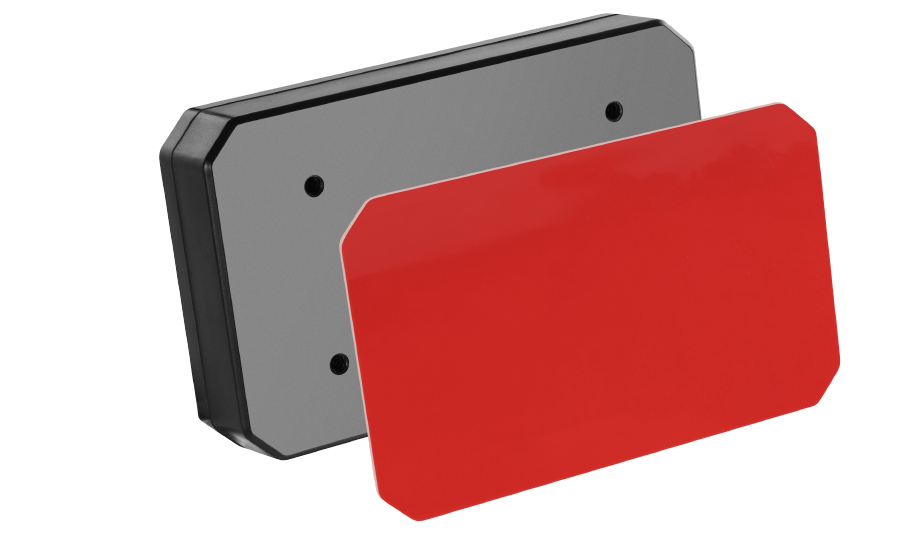
Circuit Box Mounting
Important ! Please test the whole package of this 6 gang switch panel electronic relay system with a 12 volt DC power source for full functionality before any further installation.
Find a good location to mount the circuit control box.
The ideal mounting of the box should allow for an unobstructed path for the power wires, accessory wires, and the control harnesses.
If you decide to drill, check the clearance behind the drilling location.Make sure you are not going to drill through and damage any components of the vehicle.
Once all connections and installation is completed, check the operation of the switch panel system, before reassembling the vehicle
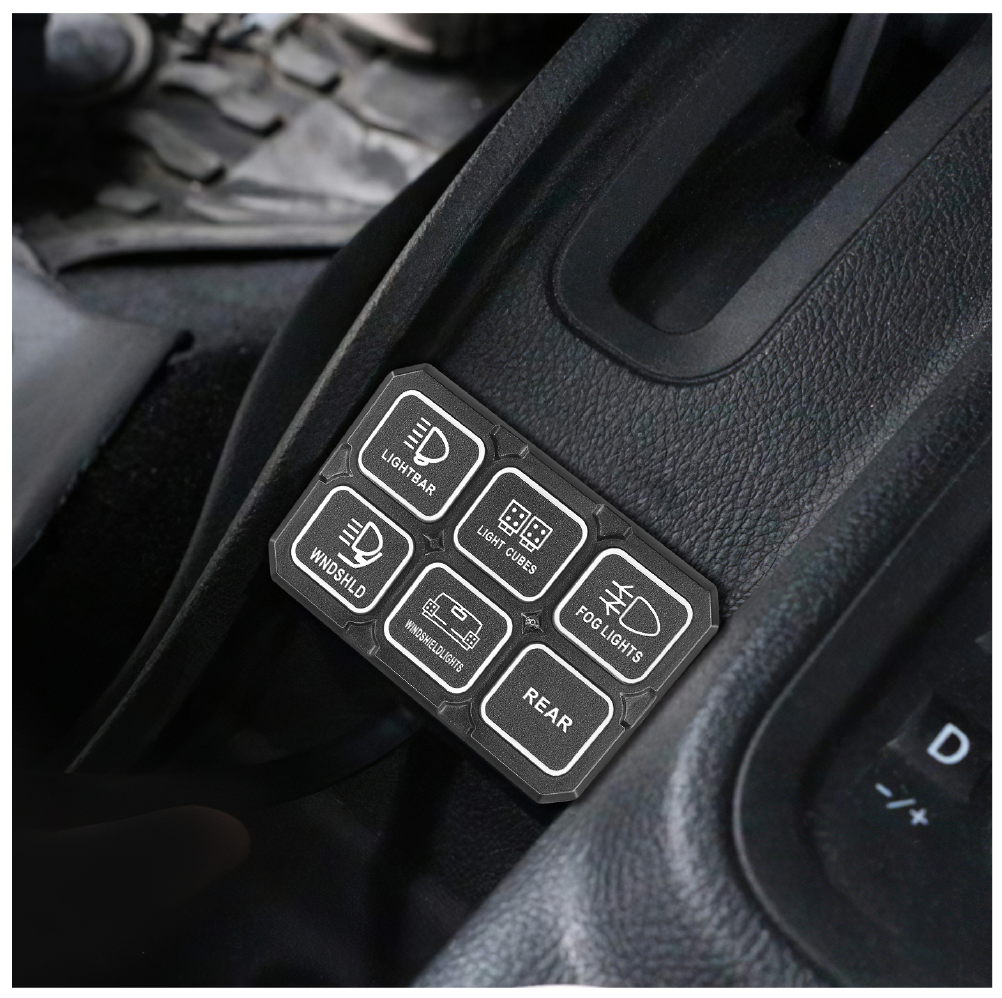
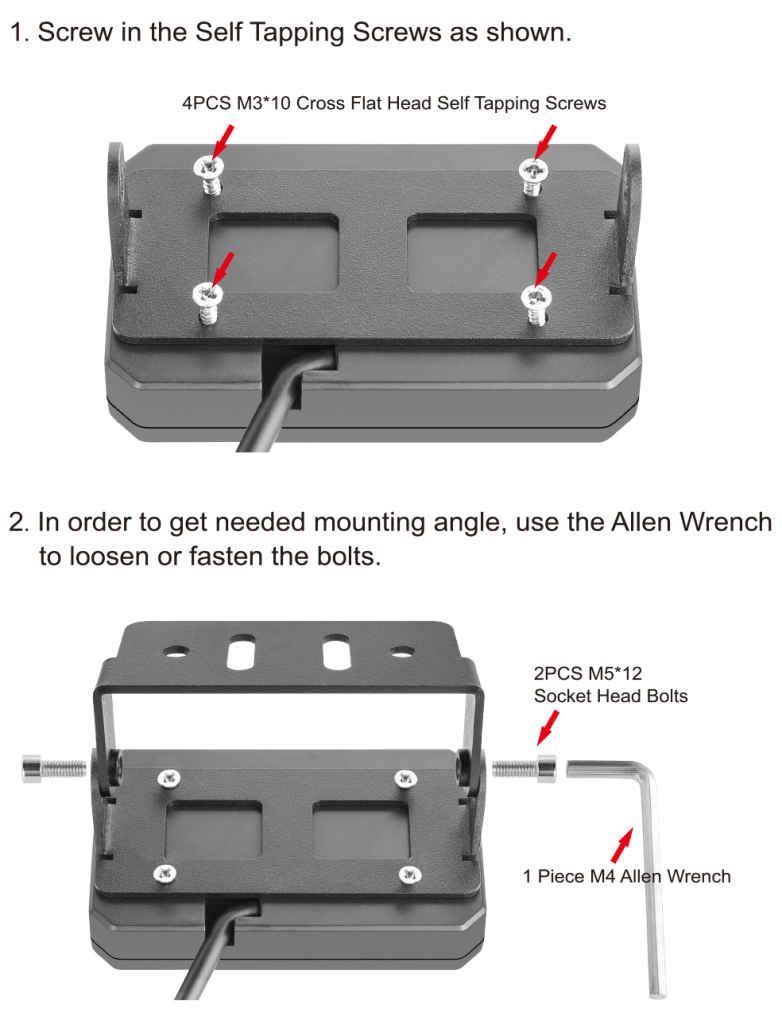
Switch Panel Mounting
There are two different mounting options provided within the box, adjustable mount bracket and double sides adhesive tape. If user hopes to get a flexible and adjustable angle of the switch panel.
use the mount bracket
Option 1:
Adjustable Mount Bracket
Check to make sure the plug & play wiring is long enough to mount the desired location.
Check the clearance behind drilling location. Make sure you will not drill through and damage any components in the vehicle.
Use bracket to mark the drill location, fix and mount the bracket with the switch panel, then proceed to the wiring installation.
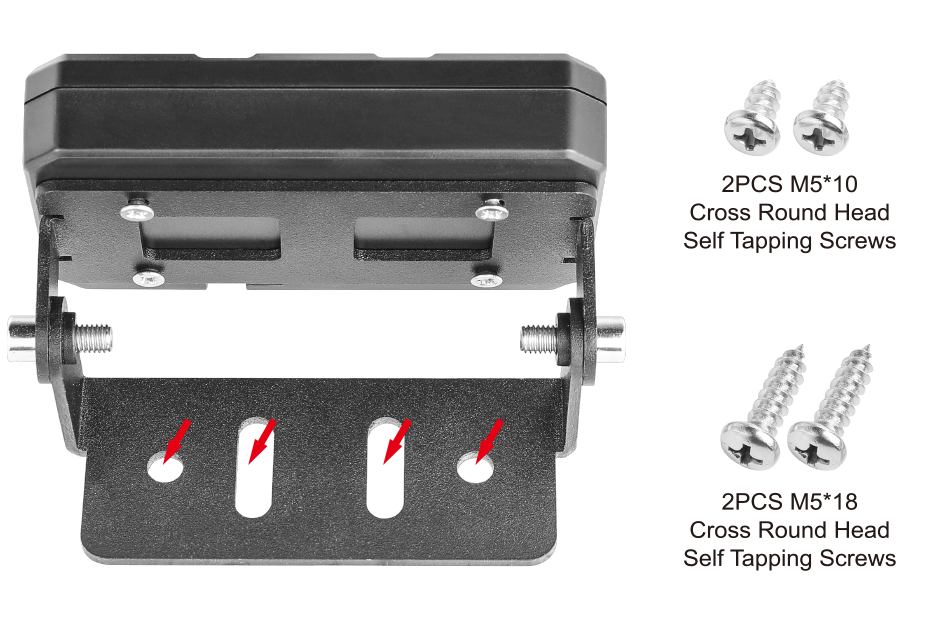
3. All the screws listed below can be used to tighten up the bracket, user can choose either the screw size you need base on the thickness between the bracket and the mounting surface. Keep the rest screws for back-up
Double Sides Adhesive Tape
If the user intended to fix the switch panel onto the mounting surface, use the double sides adhesive tape.
Thoroughly clean the desired mounting location. Use warm soapy water first to remove all wax and dirt. Then dry and use a cleaner to clean the surface. Once clean do not touch.
Make sure the wire end of the switch panel is to the driver side and peel off the adhesive tape. When the position of switch panel is correct firmly press down on the adhesive tape.


Leave a comment
Your email address will not be published. Required fields are marked *