LED MULTI-FUNCTION CHASE LIGHT BAR GUIDE
Thank you for purchasing this LED multi-function chase light bar. Your satisfaction is very important to us. Check carefully to make sure all parts are included when you open the box, if there’s any missing or damaged parts, let’s contact the shop seller for free replacement before any further installation.
 LED MULTI-FUNCTION CHASE LIGHT BAR
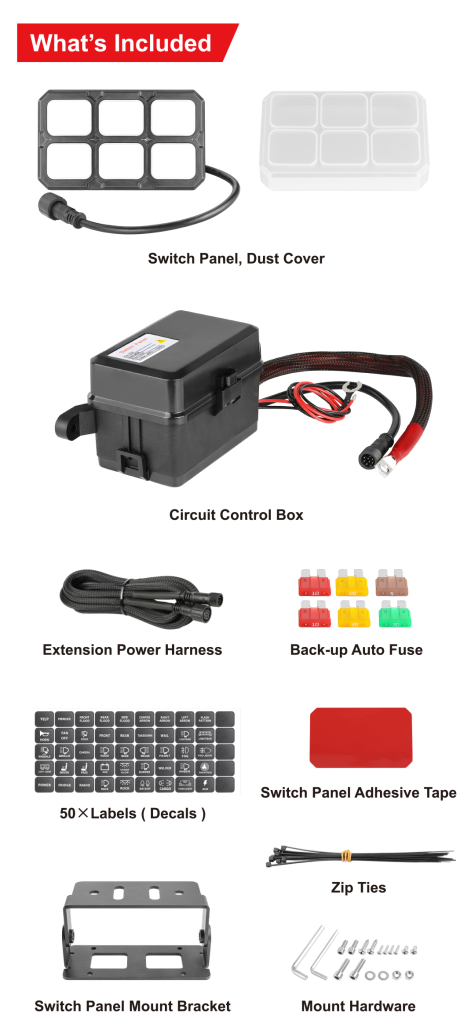
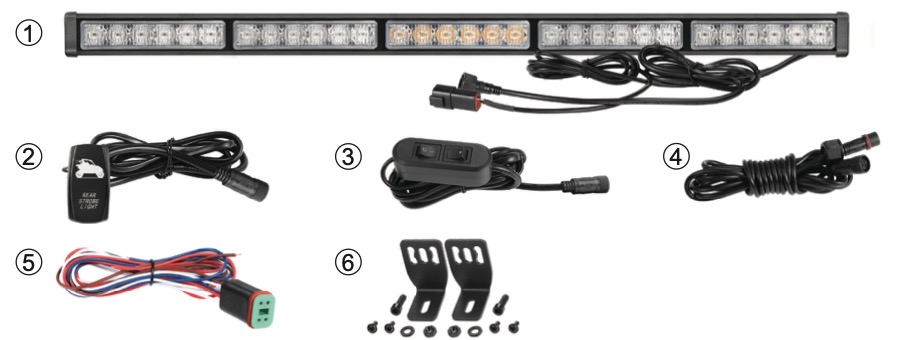
WHAT’S IN THE BOX?
 LED MULTI-FUNCTION CHASE LIGHT BAR
- LED chase light bar
- Harness with rocker switch
- Harness with in-line switch
- Extension cable harness
- Color coded splitter harness
- Mount brackets & screws
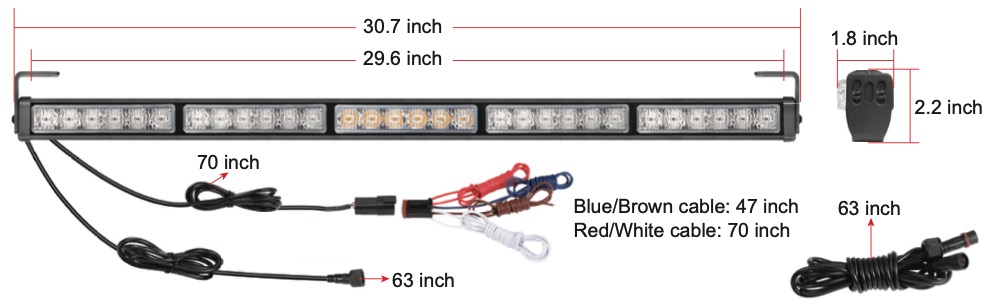
DIMENSION

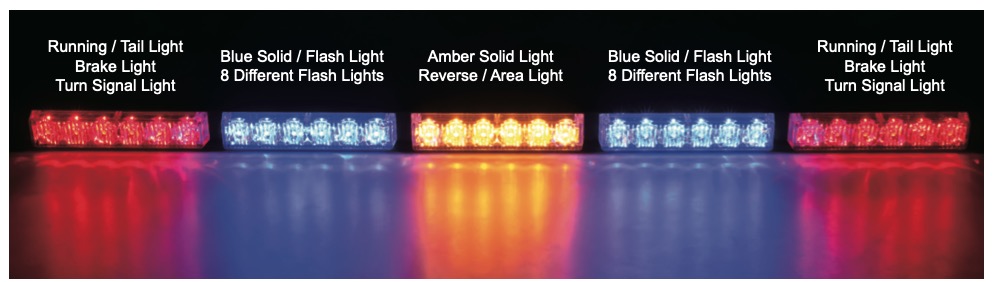
MULTI-FUNCTION

- Running / Tail Light
- Brake Light
- Turn Signal Light
- Blue Solid / Flash Light
- 8 Different Flash Lights
- Amber Solid Light
- Reverse / Area Light
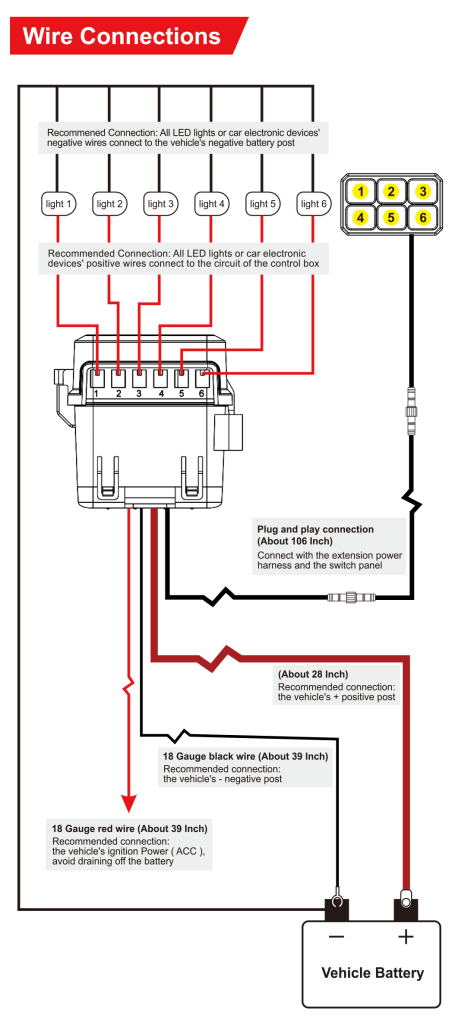
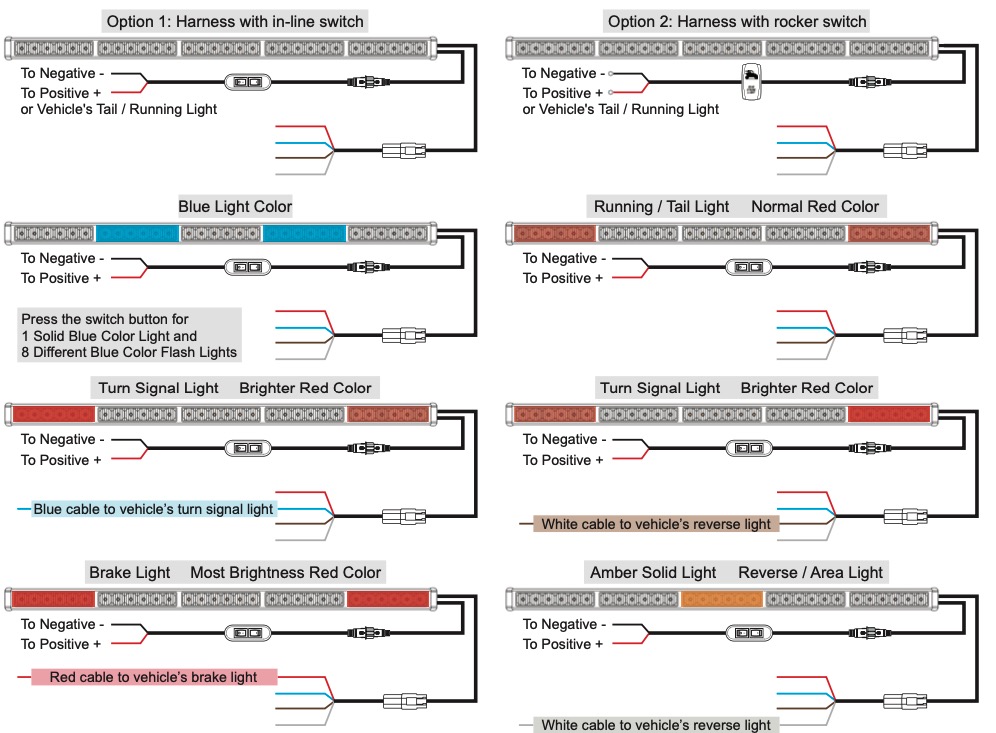
WIRE CONNECTION

- To Negative –
- To Positive +
- Blue cable to vehicle’s turn signal light
- White cable to vehicle’s reverse light
- Red cable to vehicle’s brake light
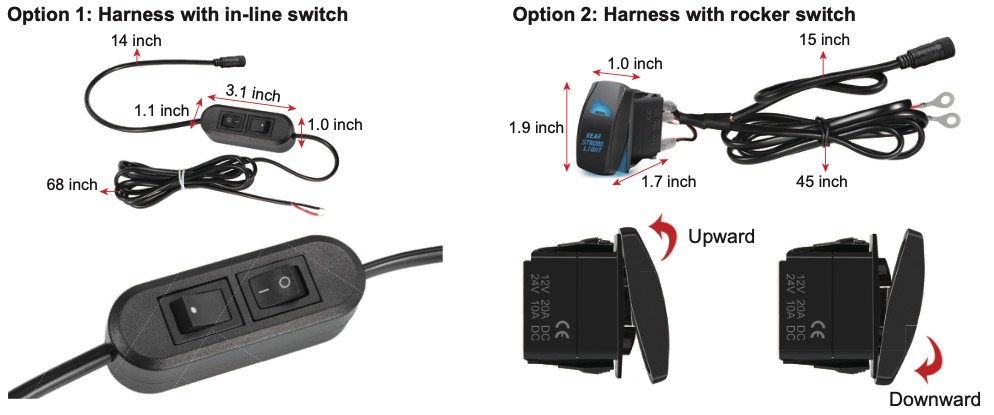
2 TYPES OF SWITCHES INCLUDED

Option 1: Harness with in-line switch
- Press – to power on
- Memorize previous light settings
- Press O to power off
- Press · 8 times for 8 different blue flash lights
- Press · the 9th time for blue solid lights
- Press · and hold on for 3 seconds to turn off blue strobe lights and solid lights
Option 2: Harness with rocker switch
- Press upward to power off
- Press downward to power on
- Memorize previous light settings
- Press downward 8 times for 8 different blue flash lights
- Press downward the 9th time for blue solid lights
- Press downward and hold on for 3 seconds to turn off blue strobe lights and solid lights

 Light Pod x 2
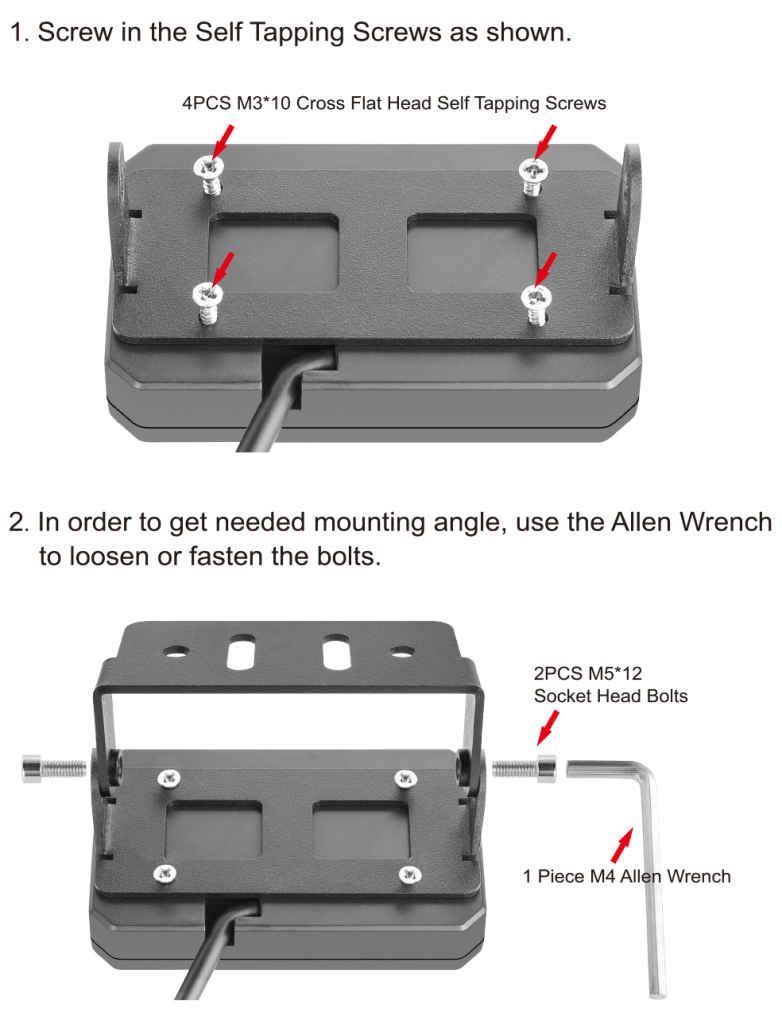
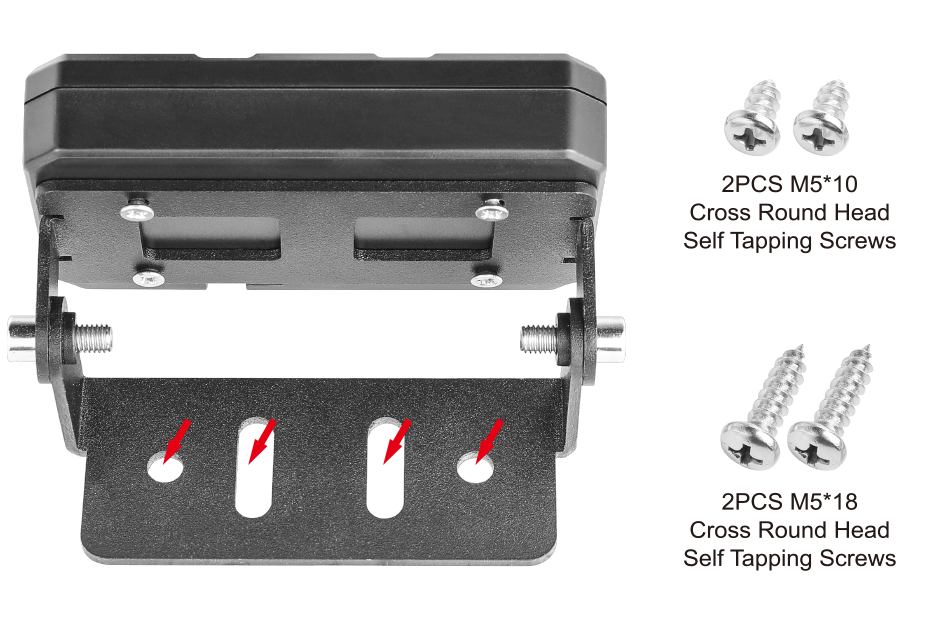
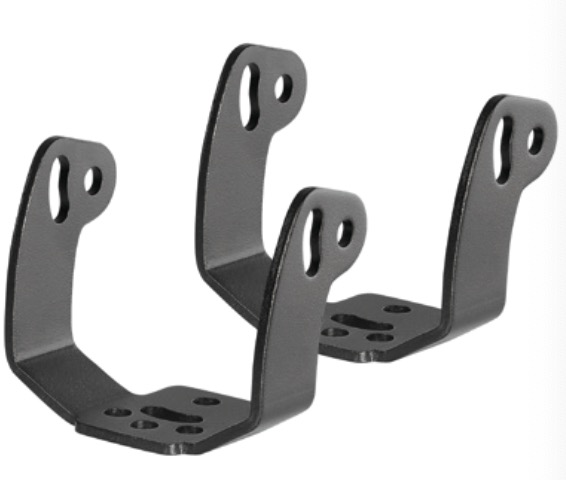 Bracket x 2
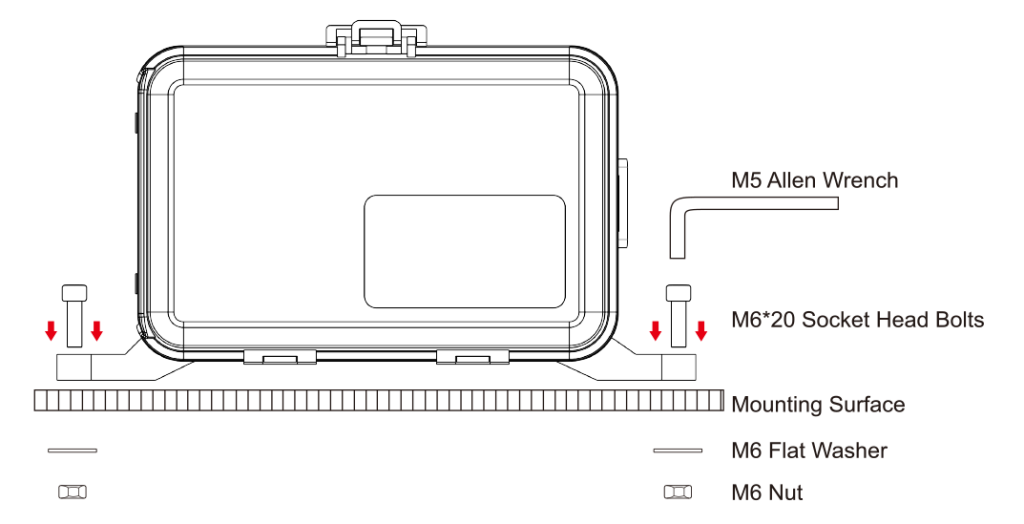
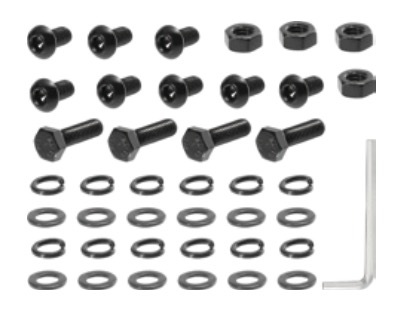 Mount Hardware for bracket
 Mount Hardware for control box
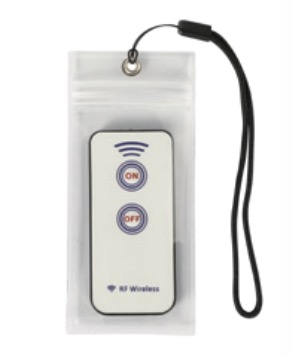 RF Remote
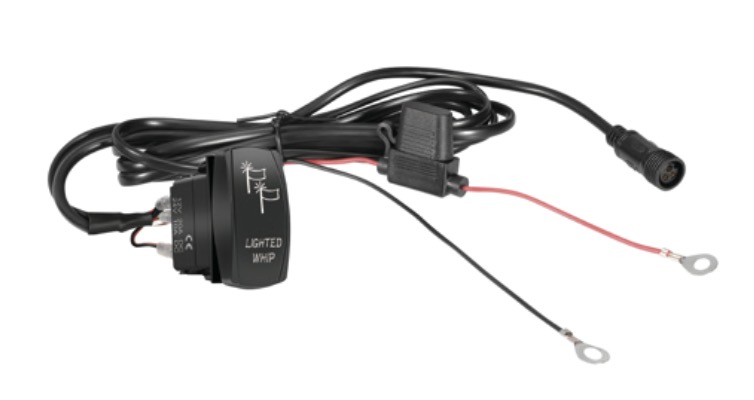 Switch Harness
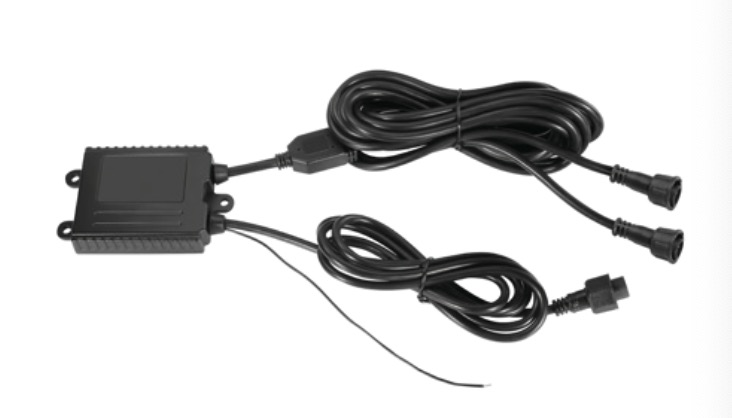 Control Box Harness